
This section introduces the essential concepts of differential adjustment, highlighting its importance for smooth vehicle operation․ Proper adjustment ensures optimal performance, prevents damage, and enhances safety․ The manual provides a comprehensive guide to understanding and executing differential adjustments effectively, covering key procedures and best practices for maintenance and repair․
1․1 What is a Differential?
A differential is a mechanical component in vehicles that allows the wheels to rotate at different speeds while maintaining traction and stability․ It is essential for smooth cornering and preventing slippage․ Located between the wheels, it distributes power evenly, ensuring proper torque delivery․ The differential enables the vehicle to navigate turns without strain on the drivetrain, making it a critical component for safe and efficient operation․ Understanding its function is fundamental for performing accurate adjustments and maintenance․
1․2 Importance of Proper Adjustment
Proper adjustment of the differential is crucial for ensuring optimal vehicle performance, safety, and longevity․ Incorrect settings can lead to uneven wear on gears, excessive noise, and reduced traction, potentially causing premature component failure․ Accurate adjustments ensure smooth power delivery, minimize wear on drivetrain components, and maintain stability during acceleration and cornering; Regular and precise adjustments also prevent costly repairs, making it a critical maintenance task for vehicle reliability and efficiency․ Proper adjustment guarantees the differential operates within manufacturer specifications, ensuring peak performance and durability․
1․3 Purpose of the Manual
This manual serves as a comprehensive guide for differential adjustment, providing step-by-step instructions for disassembly, inspection, and reassembly․ It outlines essential procedures for measuring backlash, setting preload, and ensuring precise gear mesh․ The guide also covers safety precautions, tool requirements, and troubleshooting common issues․ By following the manual, users can perform adjustments accurately, preventing damage and optimizing differential performance․ It is designed for both professionals and enthusiasts, offering clear, detailed instructions to ensure successful maintenance and repair of differential components․ The manual emphasizes adherence to manufacturer specifications for reliable outcomes․
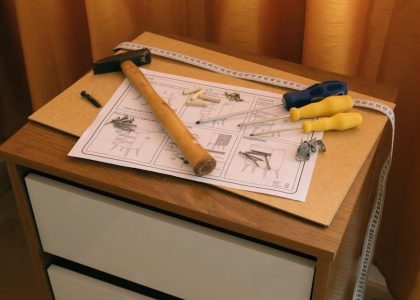
Safety Precautions and Tools
Safety: Wear protective gloves and goggles․ Ensure the differential is securely supported․ Tools: Dial caliper, torque wrench, and bearing puller are essential for precise adjustments and component removal․
2․1 Essential Safety Tips
Always wear protective gloves and safety goggles to prevent injury from flying debris․ Ensure the differential is securely supported with jack stands to avoid accidents․ Never use impact tools near open flames or sparks․ Keep loose clothing tied back and long hair secured․ Use only approved tools to prevent damage to components․ Avoid using metal scraps or makeshift tools that could cause irreversible harm․ Properly vent the workspace to avoid inhaling dust or lubricant fumes․ Consult the manufacturer’s manual for specific safety guidelines tailored to your differential type․
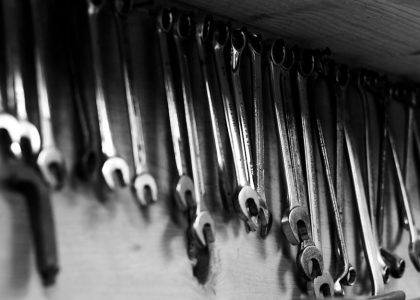
2․2 Specialized Tools Required
A dial indicator is essential for measuring backlash and ensuring precise adjustments․ A torque wrench is necessary for applying the correct preload values․ Specialized wrenches, such as those for bearing cap bolts, are required for secure fastening․ A set of precision shims is needed to fine-tune gear mesh alignment; Lubrication tools, like grease guns, are critical for proper component lubrication․ Additionally, a micrometer and bearing pullers are often necessary for disassembly and reassembly tasks․ Always use tools specifically designed for differential work to avoid damage․
2․3 Workspace Preparation
A clean, well-lit workspace is crucial for differential adjustment․ Ensure the area is free from debris and contaminants․ Use a sturdy workbench or jack stands to support the vehicle safely․ Lay out tools and components in an organized manner to avoid misplacement․ Cover the work surface with protective material to prevent damage from spills or dropped parts․ Proper ventilation is essential when handling lubricants and cleaning agents․ A well-prepared workspace enhances efficiency and safety during the adjustment process․

Disassembly of the Differential
Disassembling the differential involves removing the case, extracting the ring gear, and disassembling bearing caps․ Specialized tools like dial indicators and torque wrenches are essential for precise removal and inspection of components․
3․1 Removing the Differential Case
Removing the differential case requires careful preparation and precision․ Start by loosening the bolts gradually to avoid warping the case․ Use a dial indicator to ensure even pressure and prevent damage․ Specialized tools, such as a puller, may be necessary for safe removal․ Once detached, inspect the case for any signs of wear or damage․ Proper documentation and labeling of components are crucial for reassembly․ Always refer to the manufacturer’s guidelines for specific instructions tailored to your vehicle’s differential type․
3․2 Extracting the Ring Gear
Extracting the ring gear requires specialized tools and precision to avoid damage․ Begin by loosening the bolts in a star pattern to release tension․ Use a dial indicator to ensure the gear remains centered during removal․ Apply heat if necessary to loosen stubborn components․ Once removed, inspect the gear for wear or damage․ Proper documentation and labeling are essential for reassembly․ Always follow manufacturer guidelines to ensure safety and accuracy during this critical process․
3․3 Disassembling the Bearing Caps
Disassembling the bearing caps involves carefully removing the bolts in a star pattern to avoid warping the caps․ Use a wrench or socket to loosen and remove the bolts․ Once removed, gently pry the caps away from the differential case using a flat tool or bearing puller․ Take care not to damage the caps or the case․ Mark each cap and its corresponding bolt with paint or a marker for proper reassembly․ Inspect the bearing surfaces for wear and clean them thoroughly before proceeding with further adjustments or repairs․

Inspection of Components
Inspect the ring gear for wear, bearings for damage, and pinion gear for proper alignment․ Check all surfaces for scoring or excessive wear․ Ensure components are clean and well-lubricated before proceeding with adjustments or repairs․
4․1 Checking the Ring Gear for Wear
Examine the ring gear for signs of wear, such as scoring, pitting, or excessive tooth wear․ Use a dial indicator to measure tooth contact patterns and backlash․ Inspect the gear teeth for cracks or damage, ensuring proper alignment with the pinion gear․ Clean the surface thoroughly before reassembly to prevent contamination․ Replace the ring gear if wear exceeds manufacturer specifications, as improper wear can lead to gear failure and differential malfunction․ Always refer to the manual for specific inspection criteria and tools required for accurate assessment․
4․2 Inspecting the Bearings and Races
Inspect the bearings and races for any signs of wear, heat damage, or contamination․ Clean and lubricate the bearings thoroughly before reassembly․ Use a micrometer to measure bearing clearance and ensure it meets manufacturer specifications․ Check for pits, cracks, or uneven surfaces on the races․ Replace any damaged or worn components to maintain proper gear alignment and prevent premature failure․ Always refer to the manual for specific inspection guidelines and torque specifications to ensure accurate assessment and reassembly․ Proper inspection ensures smooth operation and longevity of the differential․
4․3 Evaluating the Pinion Gear
Evaluate the pinion gear for wear, damage, or misalignment․ Check the teeth for cracks, chips, or excessive wear using a magnifying glass․ Measure the backlash between the pinion and ring gear with a dial indicator to ensure proper mesh․ Verify that the pinion gear is correctly aligned with the ring gear to avoid uneven wear․ Clean and lubricate the gear thoroughly before reassembly․ Ensure the pinion gear’s end play is within specifications using a torque wrench․ Proper evaluation ensures smooth operation and prevents premature wear or failure of the differential components․

Reassembly and Adjustment Process
Reassemble the differential by reinstalling bearings, setting pinion preload, and adjusting gear mesh․ Ensure proper alignment and functionality, following manufacturer guidelines for precise adjustments and torque specifications․
5․1 Reinstalling the Bearings
Reinstalling the bearings requires careful alignment and lubrication․ Clean and grease the bearing surfaces thoroughly․ Use a dial caliper to ensure proper fitment and alignment․ Secure the bearings with the appropriate shims, ensuring no play remains․ Tighten the bearing caps gradually, checking preload with a torque wrench․ Verify the bearings rotate smoothly without resistance․ Proper installation ensures optimal performance and longevity of the differential․ Always refer to the manufacturer’s specifications for precise torque values and alignment guidelines to avoid damage or premature wear․
5․2 Setting the Pinion Preload
Setting the pinion preload ensures proper gear engagement and reduces wear․ Begin by cleaning and applying grease to the pinion and bearings․ Tighten the pinion nut gradually, using a torque wrench to meet specifications․ Insert shims if needed to achieve the correct preload․ Rotate the pinion to verify smooth operation․ Ensure torque values align with the manual’s guidelines for optimal performance and longevity․ Document the process for future reference and adjust as necessary to maintain precise alignment and functionality․
5․3 Adjusting the Gear Mesh
Adjusting the gear mesh is crucial for minimizing noise and wear․ Use a dial indicator to measure backlash and ensure it matches specifications․ Insert shims between the gear and housing to fine-tune the mesh․ Rotate the gears to check smooth operation and verify contact patterns with marking compound․ Tighten all components securely and retest the mesh to ensure proper alignment and functionality․ Document the final settings for future reference and adjust as needed for optimal performance and durability․
Measuring and Adjusting Backlash
Measure backlash using a dial indicator, ensuring it aligns with manufacturer specifications․ Adjust shims or spacers to achieve proper clearance․ Fine-tune settings for smooth gear operation and minimal wear․
6․1 Using a Dial Indicator
A dial indicator is essential for measuring backlash accurately․ Attach it to the differential case and position the tip against the ring gear teeth․ Rotate the differential slowly while observing the indicator’s readings․ Ensure the measurement aligns with the manufacturer’s specifications․ If backlash is incorrect, adjust the carrier bearings or shims․ Fine-tune the settings to achieve proper gear mesh and carrier bearing preload․ This step ensures smooth operation and prevents excessive wear or noise․ Always refer to the manual for precise adjustment values and procedures․
6․2 Setting the Correct Backlash Values
Backlash is the clearance between the ring gear and pinion gear teeth․ Attach the dial indicator to the differential case and measure the backlash at multiple points․ Compare the readings to the manufacturer’s specifications․ If the backlash is incorrect, adjust the shim thickness or bearing position․ Tighten the bearings gradually and recheck the backlash․ Proper adjustment ensures smooth gear engagement and prevents noise or wear․ Always consult the manual for precise values and adjustment procedures to achieve optimal differential performance and reliability․
6․3 Fine-Tuning the Adjustment
Fine-tuning ensures precise backlash and preload settings․ After initial adjustments, rotate the differential components and recheck measurements․ Use gauges to verify uniform clearance across the gear face․ Make incremental adjustments by adding or removing shims, then retest․ Ensure the pinion and ring gear mesh smoothly without excessive play or tightness․ Proper fine-tuning prevents vibration, noise, and premature wear․ Always refer to the manual for specific tolerance ranges and adjustment sequences to achieve optimal gear alignment and performance․
Preload and Torque Specifications
Preload and torque values are critical for proper differential function․ Use a torque wrench to apply specified preload settings and verify with manufacturer guidelines for accuracy and safety․
7․1 Understanding Preload Values
Preload values are essential for ensuring proper differential operation․ They define the tension applied to bearings and gears, preventing excessive wear and ensuring smooth torque transfer․ Correct preload settings, as specified in the manual, maintain optimal contact pressures and minimize the risk of component failure․ Always refer to the manufacturer’s guidelines for precise preload values, as incorrect settings can lead to noise, vibration, or premature wear․ Adjustments should be made gradually, using specialized tools like a torque wrench, to achieve the recommended specifications accurately․
7․2 Applying the Correct Torque
Applying the correct torque is crucial for ensuring the integrity of differential components․ Use a torque wrench to tighten bolts and nuts gradually, following the sequence specified in the manual․ Verify torque values against manufacturer guidelines to avoid over-tightening, which can damage bearings or gears․ Proper torque ensures even stress distribution, preventing premature wear and maintaining optimal performance․ Always double-check settings to confirm they meet specifications, as incorrect torque can lead to noise, vibration, or component failure during operation․
7․3 Verifying the Settings
After applying the correct torque, verify all settings to ensure accuracy․ Use a dial indicator to check backlash and gear mesh, ensuring they meet manufacturer specifications․ Test the differential under load to confirm smooth operation and absence of noise or vibration․ Double-check torque values on all fasteners and ensure proper seating of components․ Verification ensures reliability and longevity of the differential, preventing potential issues during vehicle operation․ Always refer to the manual for specific validation procedures tailored to your vehicle’s make and model․

Common Issues and Troubleshooting
This section addresses frequent differential problems, such as excessive noise, uneven wear, and leaks․ It provides diagnostic steps and solutions to rectify these issues effectively․
8․1 Identifying Noise Issues
Noise issues in differentials often stem from improper adjustment or wear․ Grinding or whining sounds may indicate misaligned gears or worn bearings․ To diagnose, inspect the gear mesh and bearing preload․ Use a dial indicator to measure backlash and ensure it meets specifications․ Check for uneven wear on the ring gear and pinion․ Consult the manual for torque values and adjustment procedures․ Addressing these issues promptly prevents further damage and ensures smooth operation․ Regular lubrication and proper tightening of components are also crucial for noise reduction․
8․2 Correcting Uneven Wear
Uneven wear on differential components can lead to poor performance and noise․ Inspect the gear teeth for signs of abnormal wear patterns․ Adjust the bearing caps to ensure proper alignment and preload․ Use shims to correct gear mesh misalignment, ensuring even contact․ Measure backlash and adjust as specified in the manual․ Verify torque values for all bolts and bearings․ Proper lubrication and alignment during reassembly are critical to prevent future uneven wear․ Regular maintenance and adherence to manufacturer guidelines help maintain optimal differential performance and longevity․
8․3 Fixing Leaks or Damage
Identify leaks or damage promptly to prevent further deterioration․ Replace worn or damaged seals, gaskets, and bearings․ Inspect the differential housing for cracks or corrosion and repair or replace as needed․ Use specialized tools to ensure proper seal installation; Apply high-quality lubricants to protect components․ Regularly inspect for signs of wear or fluid leakage․ Addressing issues early prevents costly repairs and ensures optimal differential performance․ Always follow manufacturer guidelines for repair procedures and part replacements to maintain reliability and safety․

Maintenance and Lubrication
Regular lubrication is crucial for reducing friction and wear; Use high-quality grease for bearings and gears․ Inspect seals and gaskets for leaks․ Follow manufacturer guidelines for optimal performance․
9․1 Lubricating the Differential
Lubrication is essential for reducing friction and wear on moving parts․ Use high-quality grease specifically designed for differential components․ Apply a generous amount to bearings, gears, and pinions․ Ensure the lubricant covers all contact surfaces evenly․ Avoid over-lubrication, as it can attract debris․ Clean old grease thoroughly before reapplication․ Refer to the manufacturer’s manual for recommended grease types and application intervals․ Proper lubrication ensures smooth operation, prevents overheating, and extends component lifespan․
9․2 Scheduling Regular Maintenance
Regular maintenance is critical to ensure the differential operates efficiently and prolong its lifespan․ Schedule inspections every 30,000 to 60,000 miles or as recommended by the manufacturer․ Check lubricant levels, bearing condition, and gear wear․ Address any signs of leakage or unusual noise promptly․ Maintain a service log to track adjustments and repairs․ Consistent upkeep prevents premature wear, reduces the risk of failure, and ensures optimal performance under various driving conditions․ Follow the manufacturer’s guidelines for intervals and procedures to maintain reliability and safety․
9․3 Signs of Wear Requiring Attention
Regular inspections help identify wear before it leads to failure․ Look for signs like metal shavings in lubricant, excessive backlash, or unusual noises․ Grinding sounds, vibrations, or difficulty turning indicate worn gears or bearings․ Check for uneven wear patterns on teeth and surfaces․ Address any leakage or visible damage promptly․ Ignoring these signs can lead to costly repairs or complete differential failure․ Always replace worn components and ensure proper adjustment to maintain performance and safety․ Early detection prevents major issues and extends the differential’s lifespan․
After completing the adjustment, perform a final inspection and test drive to ensure proper function․ Document all settings for future reference and scheduled maintenance․
10․1 Final Inspection Before Reassembly
Conduct a thorough inspection of all components to ensure they are free from damage or excessive wear․ Verify that all parts are correctly installed and aligned․ Check that the backlash, pinion preload, and gear mesh settings are within specifications․ Ensure all fasteners are properly torqued and that no shims or spacers are missing․ Lubricate all moving parts according to the manufacturer’s recommendations․ Finally, confirm that the differential case is clean and free of debris before reassembly․
10․2 Testing the Differential
After reassembly, test the differential to ensure proper function․ Rotate the differential by hand to check for unusual noise or resistance․ Use a dial indicator to verify backlash and pinion preload settings․ Operate the vehicle at low speed in a controlled environment to assess smooth operation․ Check for any signs of leakage from seals or gaskets․ Ensure all gears engage smoothly and quietly under load․ If any irregularities are detected, refer to the troubleshooting section for corrective actions․ Always follow manufacturer guidelines for final testing procedures․
10․3 Documenting the Adjustment
Accurate documentation is crucial after completing the differential adjustment․ Record all measurements, including backlash, pinion preload, and torque values applied during the process․ Note the condition of components before and after adjustment․ Maintain a detailed log of any adjustments made, including shim sizes and gear mesh settings․ Store this information with the vehicle’s service records for future reference․ Proper documentation ensures consistency and compliance with manufacturer guidelines, aiding in future maintenance and potential diagnostics․

Additional Resources and References
Download the complete differential adjustment manual in PDF for free, offering detailed guides, step-by-step instructions, and essential resources for successful differential maintenance and repair․
11․1 Recommended Tools and Suppliers
Essential tools for differential adjustment include dial indicators, torque wrenches, and specialized wrenches․ Reputable suppliers like Dana Aftermarket offer high-quality components․ Additionally, manufacturers provide specific guidelines for tools and parts, ensuring compatibility and accuracy․ Always refer to the manual for recommended suppliers and tools to maintain precision and safety during the adjustment process․ Using the correct equipment is crucial for achieving optimal results and preventing damage to the differential components․
11․2 Further Reading Materials
For in-depth understanding, additional resources include official manufacturer manuals, technical bulletins, and guides from reputable suppliers like Dana Aftermarket․ These materials provide detailed insights into differential components, troubleshooting, and advanced adjustment techniques․ Many manuals are available in PDF format, offering step-by-step instructions and diagrams․ Online forums and automotive repair communities also share valuable experiences and tips․ These resources are essential for professionals and enthusiasts seeking to enhance their knowledge and skills in differential adjustment and maintenance․
11․3 Manufacturer Guidelines
Manufacturer guidelines are crucial for accurate differential adjustment, providing specific instructions tailored to individual vehicle models․ These documents, often available in PDF format, detail torque specifications, disassembly procedures, and adjustment techniques endorsed by the manufacturer․ They emphasize safety, precision, and the use of specialized tools․ Adhering to these guidelines ensures compliance with warranty requirements and maintains vehicle performance․ Properly following manufacturer instructions minimizes risks of damage and ensures reliable operation of the differential system․ Always consult the official manual for your specific vehicle make and model before starting any adjustment work․

Final Note
Mastering differential adjustment requires precision, patience, and practice․ Always follow manufacturer guidelines and stay updated with best practices to ensure optimal results and vehicle performance․
12․1 Importance of Precision
Precision is critical in differential adjustment to ensure proper gear mesh, preload settings, and backlash values․ Even minor miscalculations can lead to noise, wear, or failure․ Using calibrated tools like dial indicators ensures accuracy․ Always refer to the manufacturer’s specifications and double-check measurements․ Attention to detail prevents costly repairs and ensures smooth operation․ Proper adjustment extends component life and maintains vehicle performance, making precision indispensable in every step of the process․
12․2 Encouragement for Practice
Practicing differential adjustment develops essential skills and confidence․ Start with straightforward tasks like measuring backlash and progress to more complex procedures․ Hands-on experience helps master techniques, ensuring accurate adjustments․ Regular practice reduces errors and enhances problem-solving abilities․ As proficiency grows, so does the ability to diagnose and correct issues effectively․ Consistent practice is key to becoming adept in differential maintenance, benefiting both personal projects and professional endeavors in automotive repair․
12․3 Staying Updated with Best Practices
Keeping up with the latest differential adjustment techniques is crucial for optimal results․ Referencing updated manuals and manufacturer guidelines ensures adherence to current standards․ Industry advancements, such as new tooling or methods, can significantly improve accuracy and efficiency․ Staying informed through workshops, forums, and technical documents helps refine skills and address emerging challenges․ Continuous learning fosters excellence in differential maintenance, ensuring safe and reliable vehicle performance․ Regularly reviewing best practices maintains proficiency and adaptability in the ever-evolving automotive landscape․