

The GE Self-Cleaning Oven combines innovative technology with user-friendly design, offering effortless cleaning and efficient cooking. This manual guides you through its features, operation, and maintenance for optimal performance and safety.
1.1 Overview of the GE Self-Cleaning Oven Features
The GE Self-Cleaning Oven offers advanced features for effortless cooking and maintenance. Its self-cleaning cycle uses high temperatures to burn away food residue, eliminating manual scrubbing. The oven includes durable, porcelain-coated racks that simplify cleanup and resist wear. Additional features like WiFi Connect allow remote operation, while safety measures such as automatic door locking ensure secure use during cleaning. The oven also boasts even heat distribution for consistent cooking results. These innovations make the GE Self-Cleaning Oven a practical and efficient choice for home cooks seeking convenience and reliability in their kitchen appliances.
1.2 Importance of Reading the Instruction Manual
Reading the instruction manual for your GE Self-Cleaning Oven is crucial for safe and effective operation. It provides detailed guidance on using advanced features, troubleshooting common issues, and maintaining the appliance. Understanding the manual ensures you utilize the self-cleaning cycle correctly, avoid potential hazards, and prolong the oven’s lifespan. Additionally, it highlights essential safety precautions, such as proper ventilation during cleaning and avoiding harmful cleaning products. The manual also explains how to access support resources, such as customer service and online troubleshooting guides. By following the manual, you can optimize your cooking experience and ensure the oven performs at its best for years to come.
Safety Instructions
Follow all safety instructions in this manual to ensure safe operation. The self-cleaning cycle operates at high temperatures, requiring proper ventilation. Avoid using abrasive cleaners, as they can damage the oven’s interior.
2.1 General Safety Precautions
Always follow safety guidelines to ensure safe operation of your GE Self-Cleaning Oven. The oven reaches extremely high temperatures during the self-cleaning cycle, so keep children and pets away. Never use abrasive cleaners or scouring pads, as they can damage the interior finish. Avoid placing flammable materials near the oven. Do not use the oven for cooking during the self-cleaning cycle. Ensure proper ventilation to prevent carbon monoxide buildup. Never look directly into the oven window during the cleaning cycle, as the intense heat can cause burns. For your safety, always follow the instructions provided in this manual.
2.2 Specific Safety Warnings for Self-Cleaning Mode
When using the self-cleaning mode, ensure the oven door is fully closed to avoid exposure to extreme heat. Keep children and pets away, as the oven reaches dangerous temperatures. Do not use commercial oven cleaners, as they can damage the interior during the cycle; Proper ventilation is crucial to prevent carbon monoxide buildup. Never leave the oven unattended during the self-cleaning process. If the oven malfunctions, turn it off immediately and disconnect power. Always follow the instructions in this manual to ensure safe operation and avoid potential hazards.
2.3 Ventilation Requirements During Self-Cleaning Cycle
Proper ventilation is essential during the self-cleaning cycle to remove smoke and odors. Open windows and ensure good airflow in the kitchen. Use an exhaust fan to help eliminate fumes. Avoid operating the self-cleaning mode in poorly ventilated areas, as this can lead to carbon monoxide buildup. Keep the oven door closed throughout the cycle to maintain safe conditions. Follow the manual’s guidelines for ventilation to ensure a safe and effective cleaning process. Always prioritize airflow to minimize potential health risks associated with high-temperature cleaning cycles.
Installation Guidelines
Ensure proper installation by a qualified installer following the provided instructions. The oven must be correctly grounded and connected to a suitable circuit breaker. Verify all connections and ensure the installer demonstrates the location of the circuit breaker for easy access.
3.1 Proper Installation Steps
Ensure the oven is installed by a qualified technician following the provided instructions. Begin by preparing the installation site, ensuring it is level and meets the specified space requirements. Carefully unpack the oven and inspect for any damage. Securely fasten the oven to adjacent surfaces using the recommended screws to prevent tipping. Connect the electrical and gas lines according to the manual, ensuring all connections are tight and leak-free. For new construction, use pedestal rails for proper alignment and stability. Seal any gaps between the oven and surrounding surfaces with silicone to maintain a secure fit. Finally, test all controls to ensure proper function.
3.2 Grounding and Circuit Breaker Setup
Proper grounding is essential for safe operation. Ensure the oven is grounded by a qualified installer according to local electrical codes. The circuit breaker should be sized appropriately to handle the oven’s power requirements, as specified in the manual. Locate the circuit breaker or fuse with the installer and mark it for easy access. This ensures quick shutdown in case of emergencies. Grounding prevents electrical shocks and ensures safe functioning of the appliance. Always verify connections before use to avoid malfunctions or hazards. If issues arise, disconnect power and consult a professional for servicing.
3.4 Installation Considerations for New Construction
For new construction installations, ensure the GE Self-Cleaning Oven is fitted with pedestal rails for stability and proper alignment. Seal gaps between the oven and surrounding surfaces using silicone to prevent heat leakage. Ensure the installation area is clear of flammable materials and maintains proper ventilation. Follow local building codes and manufacturer guidelines for electrical connections. Verify the oven is level to ensure even heat distribution and safe operation. Refer to the manual for specific dimensional requirements and installation diagrams. Proper installation ensures optimal performance and safety in new construction settings.
Operating the Self-Cleaning Oven
Operate the GE Self-Cleaning Oven by selecting cycles like bake, roast, or convection. Use the self-clean mode for high-temperature cleaning. Ensure the oven door is closed during operation for safety and efficiency.
4.1 Understanding the Self-Cleaning Cycle
The self-cleaning cycle uses high temperatures to burn food residue into ash. This process lasts approximately 4 hours and 20 minutes. Ensure the oven is empty, racks removed, and door sealed. Avoid opening during cleaning. Proper ventilation is essential to prevent fumes. Follow manual instructions for safe operation. Never use oven cleaners, as residue can damage the oven. After completion, let cool, then wipe ash with a damp cloth. This feature eliminates manual scrubbing, making maintenance effortless and efficient for users.
4.2 Preparing the Oven for Self-Cleaning Mode
To prepare for the self-cleaning cycle, remove all racks, trays, and accessories. Wipe down the oven front and door gasket with a damp cloth to prevent spillage from burning. Ensure the oven door is tightly closed and latched. Open windows for ventilation to avoid fume buildup; Do not leave large food chunks, as they may smoke excessively. Check the gasket for proper sealing to ensure efficient cleaning. Avoid using oven cleaners beforehand, as residue can damage the oven during high heat. Follow these steps to ensure a safe and effective self-cleaning process.
4.3 Initiating the Self-Cleaning Cycle
To start the self-cleaning cycle, locate the Self-Cleaning button on your oven’s control panel. Press it to activate the mode, then select the desired cleaning duration using the provided controls. The default cycle lasts 4 hours and 20 minutes. Once set, the oven door will automatically lock to ensure safety during high-temperature cleaning. Ensure proper ventilation by opening windows to prevent fume buildup. The oven will heat to extreme temperatures to burn away food residue. Do not attempt to open the door or interrupt the cycle once it has begun. Let the cycle complete, then allow the oven to cool before wiping down the interior.
4.4 Remote Operation and WiFi Connect Features
The GE Self-Cleaning Oven offers remote operation through WiFi Connect, allowing you to control and monitor your oven from your smartphone. Download the GE Appliances Smart HQ app to enable this feature. Once connected, you can start or stop the self-cleaning cycle, adjust settings, and receive notifications. Remote operation adds convenience, enabling you to initiate cleaning even when you’re not at home. Ensure your oven is properly connected to your home WiFi network and follow the setup instructions in the app for seamless functionality. This feature enhances usability and ensures your oven operates efficiently, even from a distance.

Maintenance and Cleaning
Regular maintenance ensures optimal performance. Use the self-cleaning feature for food residue. Avoid harsh chemicals; clean racks and exterior gently for longevity.
5.1 Cleaning the Oven Interior and Racks
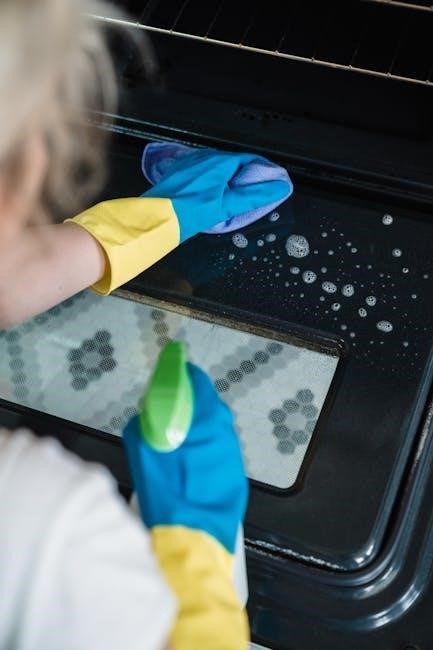
For the oven interior, use the self-cleaning feature, which burns food residue at high temperatures. Avoid harsh chemicals, as they can damage the finish. For manual cleaning, wipe spills with a damp cloth during cooldown. Racks are dishwasher-safe or can be soaked in mild detergent. Remove racks before self-cleaning to prevent warping. Always rinse and dry racks thoroughly before reinstalling. Never use abrasive cleaners or scouring pads, as they may scratch surfaces. Regular cleaning maintains efficiency and appearance.
5.2 Care and Maintenance Tips
Regular maintenance ensures your GE Self-Cleaning Oven performs optimally. Avoid using abrasive cleaners or harsh chemicals, as they can damage the finish. After each use, wipe spills with a damp cloth to prevent residue buildup. For tough stains, only clean when the oven is cool. Check racks periodically for wear and tear, and replace if damaged. Clean the door seals regularly to maintain a tight closure. Ensure proper ventilation during and after self-cleaning cycles to prevent odors. Always follow the recommended cleaning schedules in this manual to maintain your oven’s efficiency and longevity.
5.3 Avoiding Damage from Oven Cleaners
To prevent damage, never use commercial oven cleaners on your GE Self-Cleaning Oven. These products can harm the finish, damage racks, or interfere with the self-cleaning function. Instead, clean the oven interior with a soft sponge and mild detergent when cool. Avoid abrasive materials that may scratch surfaces. For tough stains, rely on the self-cleaning cycle, which safely burns away food residue at high temperatures. Always follow the cleaning methods recommended in this manual to protect your oven’s surfaces and ensure long-term performance. Proper care prevents unnecessary repairs and maintains your oven’s efficiency.
Troubleshooting Common Issues
Address common issues like malfunctioning self-clean mode, residue, or odors by referring to the manual. For persistent problems, contact GE customer support for assistance.
6.1 Malfunctioning Self-Cleaning Mode
If the self-cleaning mode malfunctions, turn off the oven and disconnect the power supply immediately. Check for error codes or unusual behavior. Ensure the oven door is closed properly and controls are set correctly. If issues persist, consult the manual or contact GE customer support. Avoid using harsh cleaners, as they can damage the interior during future cycles. For persistent problems, professional servicing may be required to restore functionality and safety.
6.2 Dealing with Residue and Odors Post-Cleaning
After the self-cleaning cycle, some residue may remain. Wipe down the interior with a damp cloth while the oven is still warm. For lingering odors, mix baking soda and water to create a paste, apply it overnight, then rinse. Avoid using commercial cleaners, as they can damage the finish. Proper ventilation during the cleaning cycle helps minimize odors. If odors persist, repeat the process or check for any food particles missed during cleaning. Regular maintenance ensures a fresh and clean oven environment for future use.
6.3 Addressing Carbon Monoxide Concerns
During the self-cleaning cycle, high temperatures can release carbon monoxide. Ensure proper ventilation by opening windows or using an exhaust fan. Avoid operating the oven in poorly ventilated spaces. Never open the oven door during the cycle, as this can release harmful fumes. If you detect unusual odors or dizziness, immediately ventilate the area and turn off the oven. Consider installing a carbon monoxide detector for added safety. Always follow the manual’s guidelines to minimize risks associated with self-cleaning mode.
Warranty and Support Information
The GE Appliances warranty is extended to the original purchaser and any succeeding owner for home use within the USA. Keep this manual safe to resolve any issues that may occur.
7.1 Understanding the GE Appliances Warranty
The GE Appliances warranty is designed to provide coverage for defects in materials and workmanship. This warranty extends to the original purchaser and any succeeding owner for products purchased for home use within the USA. The warranty period varies by product, but generally covers parts and labor for one year from the date of purchase. For detailed information, refer to the warranty section in this manual. GE Appliances also offers support for modifications, covering up to $300 for necessary adjustments during installation. Always keep this manual handy for quick reference and warranty-related inquiries.
7.2 Contacting Customer Support
For any inquiries or assistance with your GE Self-Cleaning Oven, contact GE Appliances Customer Support. Visit their official website at geappliances.com for extensive resources, including manuals, troubleshooting guides, and FAQs. You can also reach their support team via phone at the number provided in this manual. Additionally, register your appliance online to receive updates and product information. For specific concerns, such as warranty claims or technical issues, use the contact details listed in the Consumer Support section of this manual. GE Appliances is committed to ensuring your satisfaction and providing timely assistance.
7.3 Online Resources and Manual Downloads
GE Appliances offers comprehensive online resources to support your self-cleaning oven. Visit geappliances.com to download the full owner’s manual, access troubleshooting guides, and explore warranty information. The website also features instructional videos, FAQs, and user-friendly guides tailored to your specific model. For convenience, you can search by model number to find exact documentation. Additionally, GE provides live chat and phone support for further assistance. Utilize these resources to optimize your oven’s performance and resolve any issues promptly.